发布jar包到Maven中央仓库
在 maven 中引入第三方 jar 包是非常简单的,只需使用 groupId + artifactId + version 就能从 Maven 仓库中下载对应的 jar 包。
例如:引入 guava 的 jar 包
1 | <dependency> |
本文就介绍如何将自己的 jar 包发布到 Maven 中央仓库。
创建issue
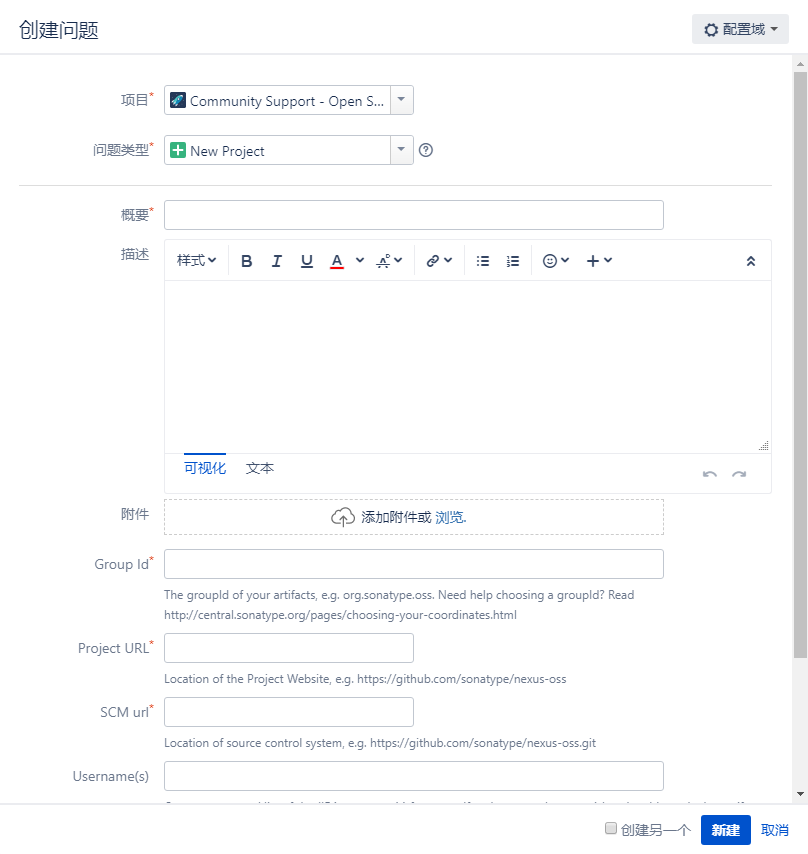
首先需要在 https://issues.sonatype.org/secure/Dashboard.jspa 注册一个账号,创建一个新项目的 issue 并提交。

- Project 选择 Community Support,Issue type 选择 New Project。
- 注意 Group Id,如果有对应域名的话则使用域名对应的 Group Id(例如 netty 项目的域名是 netty.io,则 Group Id 为 io.netty),没有自己的域名最好就填 com.github.xxx,因为在 issue 里审核员会询问你是否拥有 Group Id 对应的域名并且要求你进行技术验证,没有的话审核会不通过,而托管在 github 上的话就可以直接使用 github 的域名来完成审核。
issue审核
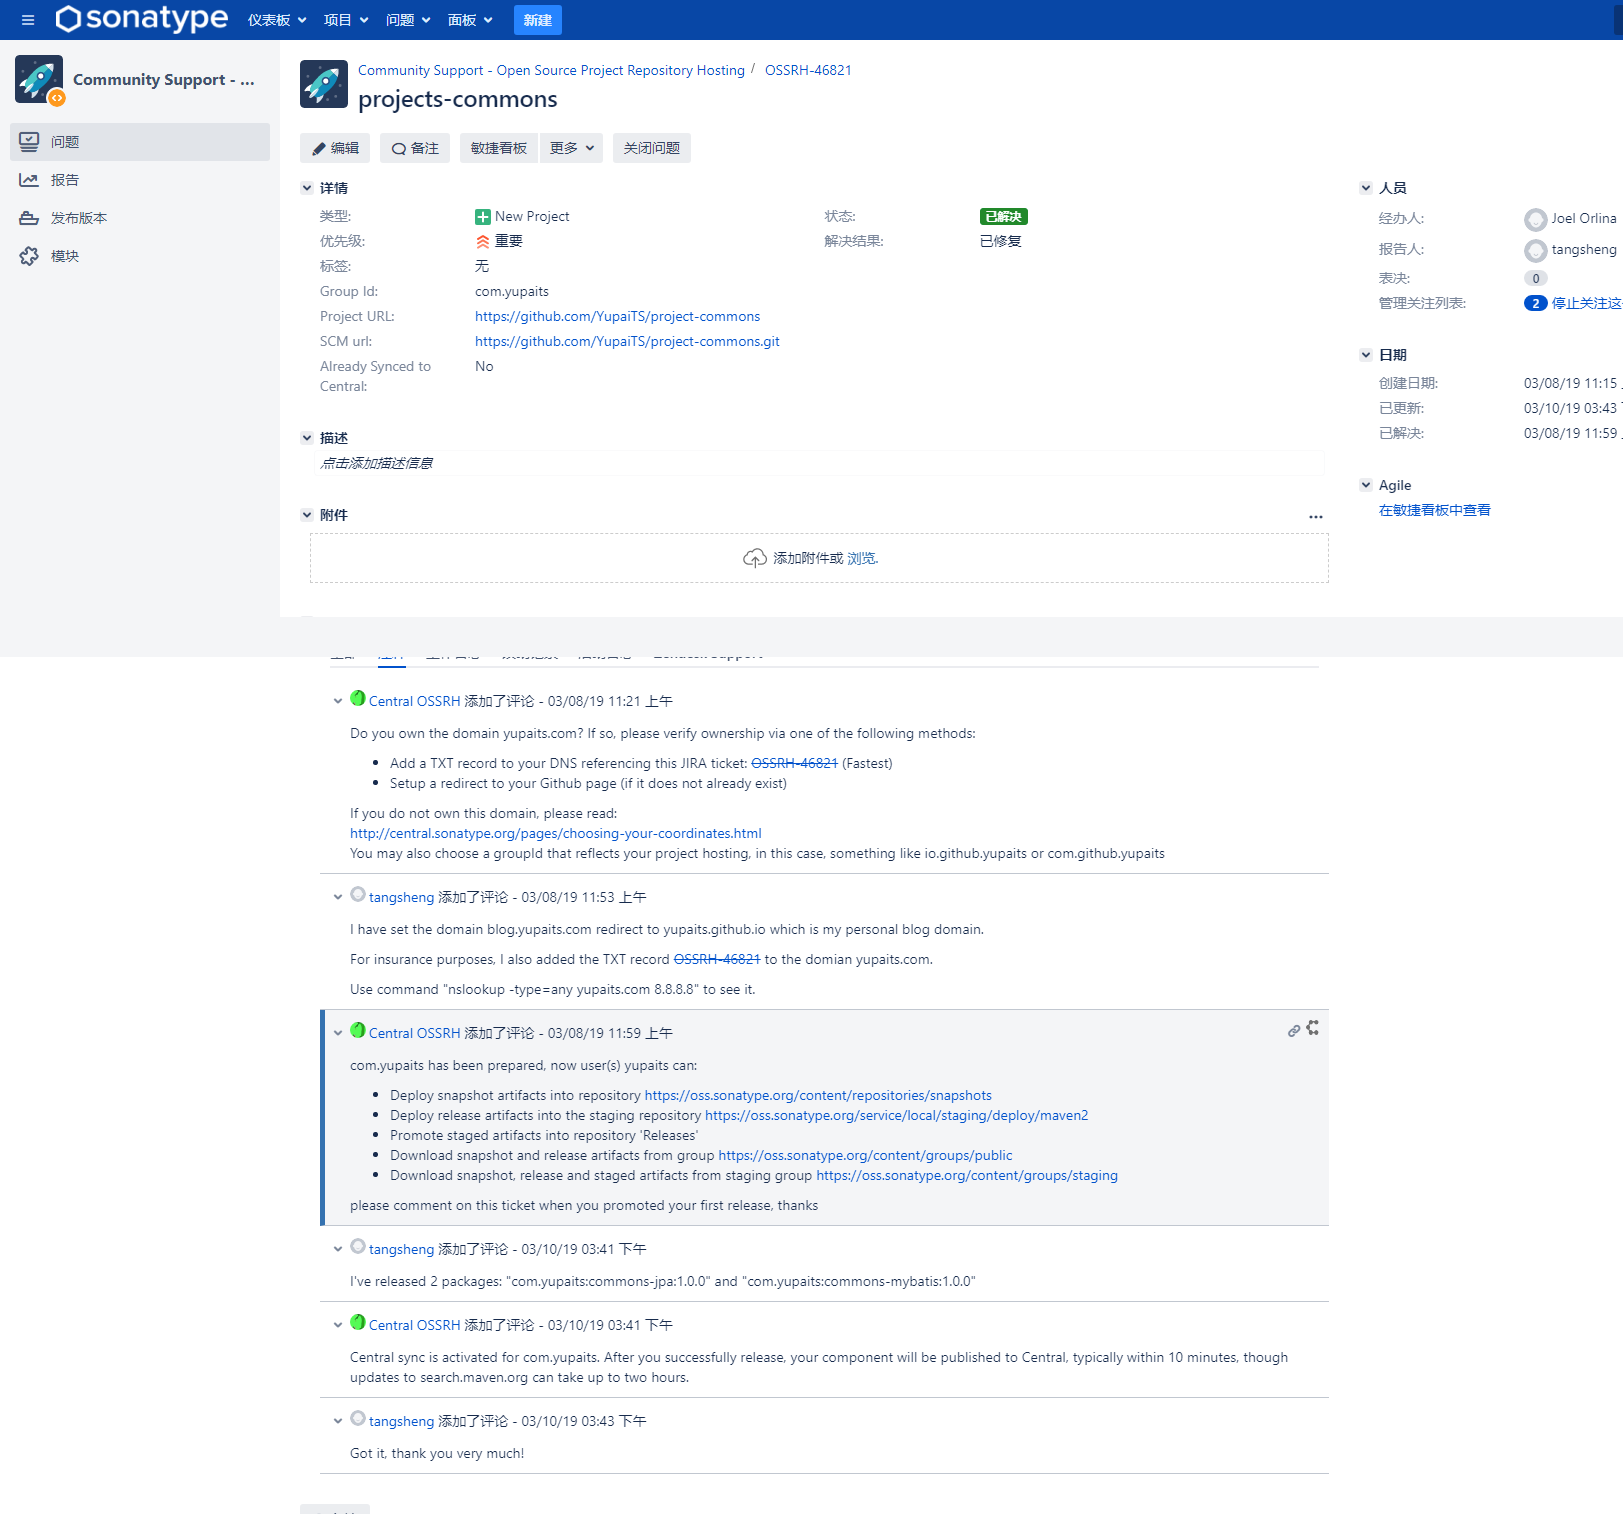
创建成功后等 1-2 个小时左右就会有工作人员评论 issue,问你是否持有域名。

如果是用com.github.xxx的 Group Id,就回复要使用com.github.xxx作为你的域名,否则有域名就回复有就好,接着等待工作人员确认(我等了一天),确认成功之后 issue 的状态就会变成RESOLVED,这个时候就有资格上传 jar 包到 maven 仓库了。
gpg管理密钥
在上传 jar 包之前,先要使用 gpg 工具生成 RSA 密钥对,并把公钥上传到公共密钥服务器,这样在发布 jar 包时能校验用户的身份。
下载 gpg 工具,下载地址,下载对应操作系统的版本然后进行安装。
验证安装和上传生成的公钥
验证 gpg 是否安装成功
1
gpg --version
生成 RSA 密钥对
1
gpgp --gen-key
接着需要填写名字和邮箱等等基本信息,这些都不是重点,最主要的是有个
Passphase的选项在填完之后记下来,到时候发布 jar 包的时候要用到。查看生成的密钥,并上传至密钥服务器
需要上传到服务器的就是 pub 里的公钥串
DA4832CAE9C6100EBD5CB4D1AF21758121E778AE1
gpg --list-keys
1
2
3
4
5------------------------------------------------
pub rsa2048 2019-03-08 [SC] [expires: 2021-03-08]
DA4832CAE9C6100EBD5CB4D1AF21758121E778AE
uid [ultimate] yupaits <ts495606653@hotmail.com>
sub rsa2048 2019-03-08 [E] [expires: 2021-03-08]上传公钥至密钥服务器,国内可以用这个服务器
hkp://keyserver.ubuntu.com:11371。1
gpg --keyserver hkp://keyserver.ubuntu.com:11371 --send-keys DA4832CAE9C6100EBD5CB4D1AF21758121E778AE
上传完成后验证是否成功
1
gpg --keyserver hkp://keyserver.ubuntu.com:11371 --receive-keys DA4832CAE9C6100EBD5CB4D1AF21758121E778AE
验证成功
1
2
gpg: Total number processed: 1
gpg: unchanged: 1
maven配置
修改项目中的pom.xml文件,添加部署相关配置,以下是个人项目
project-commons的 pom.xml 示例:1
2
3
4
5
6
7
8
9
10
11
12
13
14
15
16
17
18
19
20
21
22
23
24
25
26
27
28
29
30
31
32
33
34
35
36
37
38
39
40
41
42
43
44
45
46
47
48
49
50
51
52
53
54
55
56
57
58
59
60
61
62
63
64
65
66
67
68
69
70
71
72
73
74
75
76
77
78
79
80
81
82
83
84
85
86
87
88
89
90
91
92
93
94
95
96
97
98
99
100
101
102
103
104
105
106
107
108
109
110
111
112
113
114
115
116
117
118
119
120
121
122
123
124
125
126
127
128
129
130
131
132
133
134
135
136
137
138
139
140
141
142
143
144
145
146
147
<project xmlns="http://maven.apache.org/POM/4.0.0" xmlns:xsi="http://www.w3.org/2001/XMLSchema-instance"
xsi:schemaLocation="http://maven.apache.org/POM/4.0.0 https://maven.apache.org/xsd/maven-4.0.0.xsd">
<modelVersion>4.0.0</modelVersion>
<groupId>com.yupaits</groupId>
<artifactId>project-commons</artifactId>
<version>${revision}</version>
<packaging>pom</packaging>
<parent>
<groupId>org.springframework.boot</groupId>
<artifactId>spring-boot-starter-parent</artifactId>
<version>2.1.5.RELEASE</version>
<relativePath/>
</parent>
<name>project-commons</name>
<description>项目通用commons</description>
<url>https://github.com/yupaits/project-commons</url>
<scm>
<url>https://github.com/yupaits/project-commons.git</url>
</scm>
<licenses>
<license>
<name>MIT License</name>
<url>https://github.com/yupaits/project-commons/blob/master/LICENSE</url>
</license>
</licenses>
<developers>
<developer>
<id>yupaits</id>
<url>https://github.com/yupaits</url>
<email>ts495606653@hotmail.com</email>
</developer>
</developers>
<properties>
<revision>1.0.12</revision>
<project.build.sourceEncoding>UTF-8</project.build.sourceEncoding>
<project.reporting.outputEncoding>UTF-8</project.reporting.outputEncoding>
<java.version>1.8</java.version>
</properties>
<modules>
<module>commons-parent</module>
<module>commons-annotation</module>
<module>commons-extension</module>
<module>commons-jpa</module>
<module>commons-mybatis</module>
</modules>
<distributionManagement>
<repository>
<id>releases</id>
<url>https://oss.sonatype.org/service/local/staging/deploy/maven2</url>
</repository>
<snapshotRepository>
<id>snapshots</id>
<url>https://oss.sonatype.org/content/repositories/snapshots</url>
</snapshotRepository>
</distributionManagement>
<build>
<plugins>
<plugin>
<groupId>org.apache.maven.plugins</groupId>
<artifactId>maven-compiler-plugin</artifactId>
<version>3.8.0</version>
<configuration>
<source>1.8</source>
<target>1.8</target>
</configuration>
</plugin>
<plugin>
<groupId>org.apache.maven.plugins</groupId>
<artifactId>maven-source-plugin</artifactId>
<version>3.0.1</version>
<executions>
<execution>
<phase>package</phase>
<goals>
<goal>jar-no-fork</goal>
</goals>
</execution>
</executions>
</plugin>
<plugin>
<groupId>org.apache.maven.plugins</groupId>
<artifactId>maven-javadoc-plugin</artifactId>
<version>3.1.0</version>
<configuration>
<additionalOptions>
<additionalOption>-Xdoclint:none</additionalOption>
</additionalOptions>
</configuration>
<executions>
<execution>
<phase>package</phase>
<goals>
<goal>jar</goal>
</goals>
</execution>
</executions>
</plugin>
<plugin>
<groupId>org.apache.maven.plugins</groupId>
<artifactId>maven-gpg-plugin</artifactId>
<version>1.6</version>
<executions>
<execution>
<id>sign-artifacts</id>
<phase>verify</phase>
<goals>
<goal>sign</goal>
</goals>
</execution>
</executions>
</plugin>
<plugin>
<groupId>org.codehaus.mojo</groupId>
<artifactId>flatten-maven-plugin</artifactId>
<inherited>true</inherited>
<executions>
<execution>
<id>flatten</id>
<phase>process-resources</phase>
<goals>
<goal>flatten</goal>
</goals>
<configuration>
<updatePomFile>true</updatePomFile>
<flattenMode>bom</flattenMode>
<pomElements>
<parent>remove</parent>
<distributionManagement>remove</distributionManagement>
<repositories>remove</repositories>
<dependencyManagement>resolve</dependencyManagement>
<properties>interpolate</properties>
</pomElements>
</configuration>
</execution>
</executions>
</plugin>
</plugins>
</build>
</project>把之前创建 issue 时注册的账号配置到 maven 的配置文件里,找到 maven 的 setting.xml文件,在
<servers>标签里添加。1
2
3
4
5
6
7
8
9
10<server>
<id>releases</id>
<username></username>
<password></password>
</server>
<server>
<id>snapshots</id>
<username></username>
<password></password>
</server>
部署jar包
使用下面的命令行将项目打包构建并上传至maven仓库。
1
mvn clean deploy -Dgpg.passphrase=YourPassphrase
使用创建 issue 时的账号登录到 https://oss.sonatype.org/,然后看图操作。

Close 完了系统会验证 jar 包,点击刷新可以看到最新的进度,当全部验证通过的时候,状态会变成
closed,然后再选中文件Release就发布完成了。然后等个几个小时就可以在中央仓库搜索到自己发布的 jar 包了。

